Reference: Xilinx University Program
Experimental platform: ZYBO development board
What this experiment will do is a simple FPGA-based image processing program that implements two functions:
1. Output a histogram of a grayscale image.
2. Process an underexposed image to make it more contrast.
1. Vivado HLS part
First, we use Vivado HLS to program the IP core used for FPGA image processing.
1. Draw a histogram
1. First, write the corresponding C/C++ language program, add it to the Vivado HLS project, and then write the corresponding testbench code for compilation and testing.
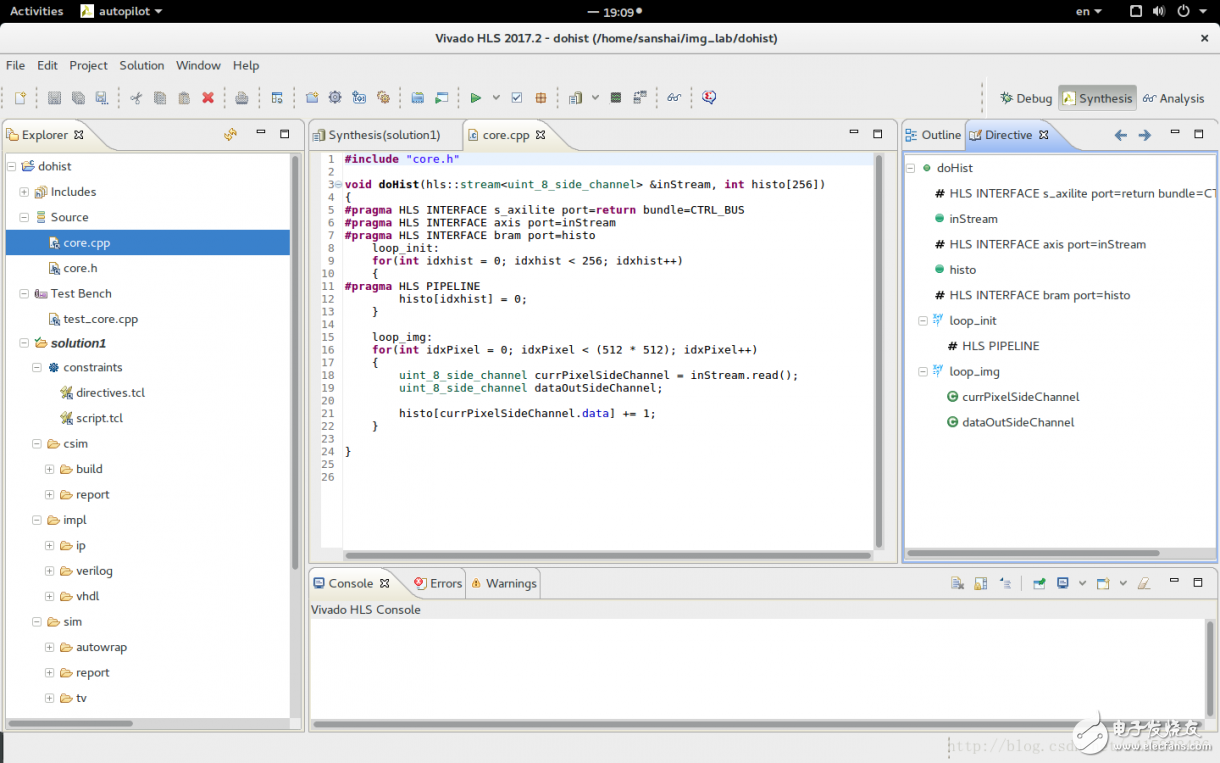
The code is very simple.
Note that the optimized part in the DirecTIve window on the right indicates that the output interface of doHist uses the AXI4-lite transmission protocol, the inStream image input interface uses the AXI4 protocol, the input array histo is stored in bram, and the loop_init loop is expanded.
2. Click Run C SimulaTIon to compile and test the C/C++ source file.

Part of the output histogram text file
3. After comparing the histogram text output by testbench with the histogram file in MATLAB to verify that the algorithm is correct, click Run C/RTL CosimulaTIon to perform collaborative verification.
4. After the verification is passed, click Export RTL to generate the ip core.
As shown in the above steps, the IP core that draws the histogram has been generated successfully.
2. Adjust the contrast
The steps are as shown above, the interface part also uses the AXI4 protocol, the effect is as follows.

Before processing

After treatment
Two, Vivado comprehensive part
1. Deploy the IP core to the FPGA
Open the Vivado interface, build the project, and then create the Block Design.
In the Block Design interface, you first need to add zynq7 processing system, click ADD IP to find ZYNQ to add IP core. This IP core is an IP core provided by the system to connect ARM and FPGA. For details, please see: https://. .
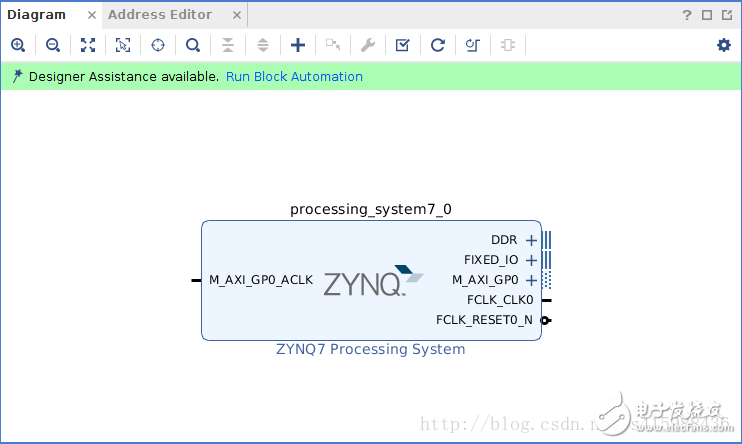
Then click Run Block AutomaTIon for automatic configuration.
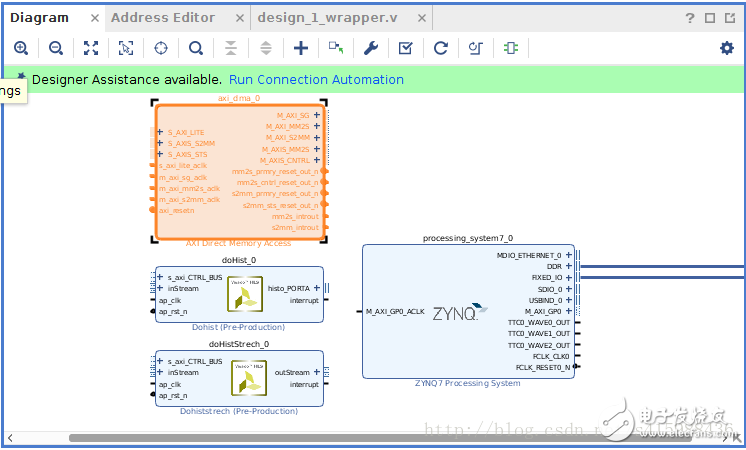
Import the two IP cores generated by HLS into the project, and add doHist, doHistStrech and AXI DMA to the diagram in the same steps.
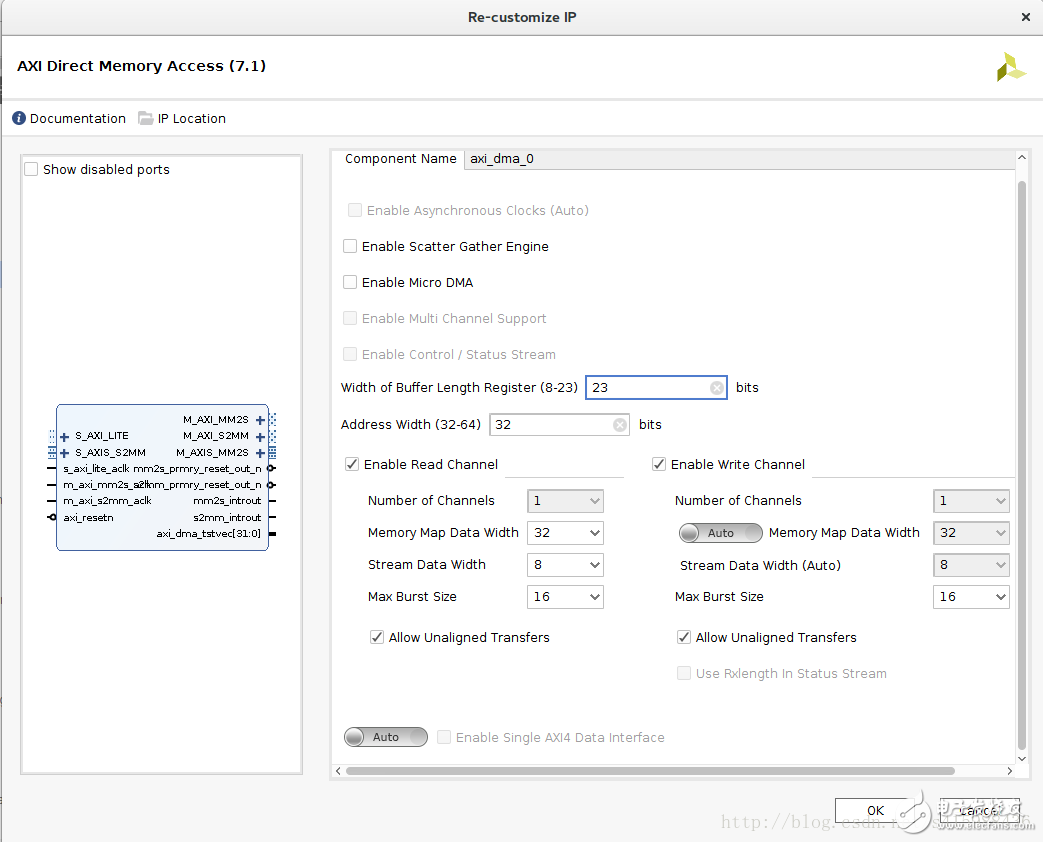
Double-click AXI DMA to configure the IP core, the configuration is shown in the figure.
You can use Run Connection Automation to automatically connect. The finished rendering is as follows, the missing ip core can be added according to the following figure.
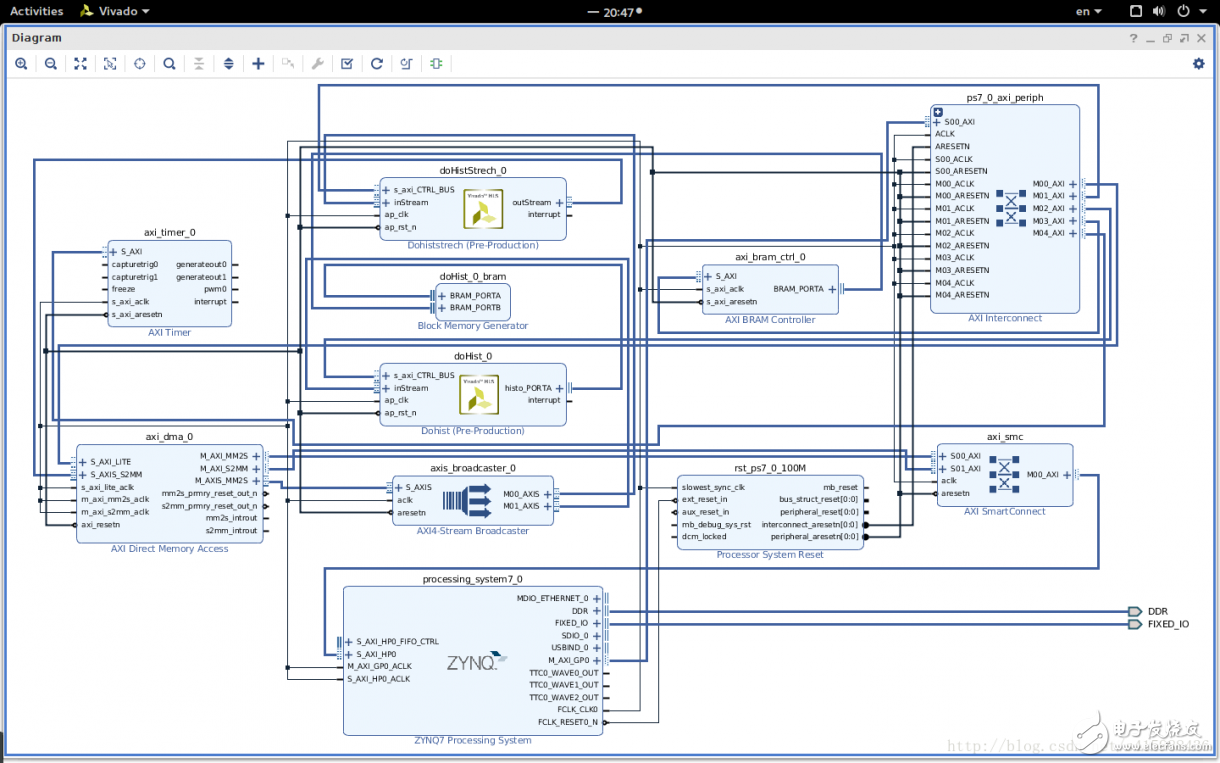
Click Validate Design to verify after completion.
Then you can generate bitstream and download it to FPGA.
2. Use logic analyzer to debug
3. Use ARM to test the acceleration effect of FPGA
1. After the download is complete, click File-"Export-"Export Hardware, a dialog box pops up
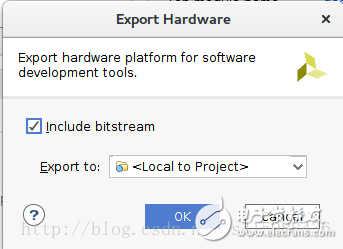
Check include bitstream and click OK.
2. Click File-》Launch SDK to start the SDK
3. The SDK development environment is as follows, which is mainly used for the development of ARM, and the corresponding driver function will be generated when the ip core is generated before.
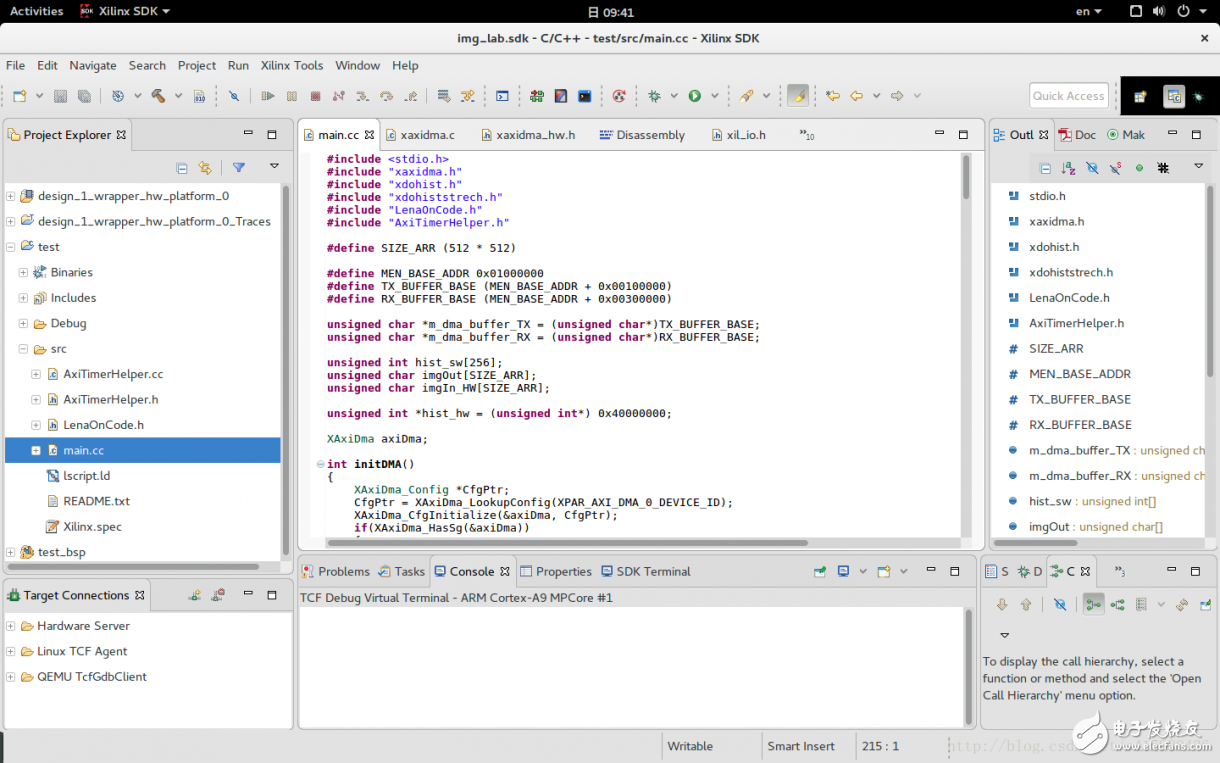
4. The experimental results are shown in the figure below

Car Window Relay,New Model Car Window Relay,Auto Car Window Relay,Window Lifting Relay
Ningbo Xingchuangzhi Electric Appliance Co.,Ltd. , https://www.xingchuangzhi.com